
Mass Email
Mass Email sends an email to a group of your paying members. You choose who gets it with filters (membership type, plan, price, payment status and attendance), check the list, then write and send.
Who can use it: staff with the mass email role, and admins. This is a separate role because the list shows what members pay.
Open it from the menu: Community → Mass Email. The page has two tabs: New email and History.
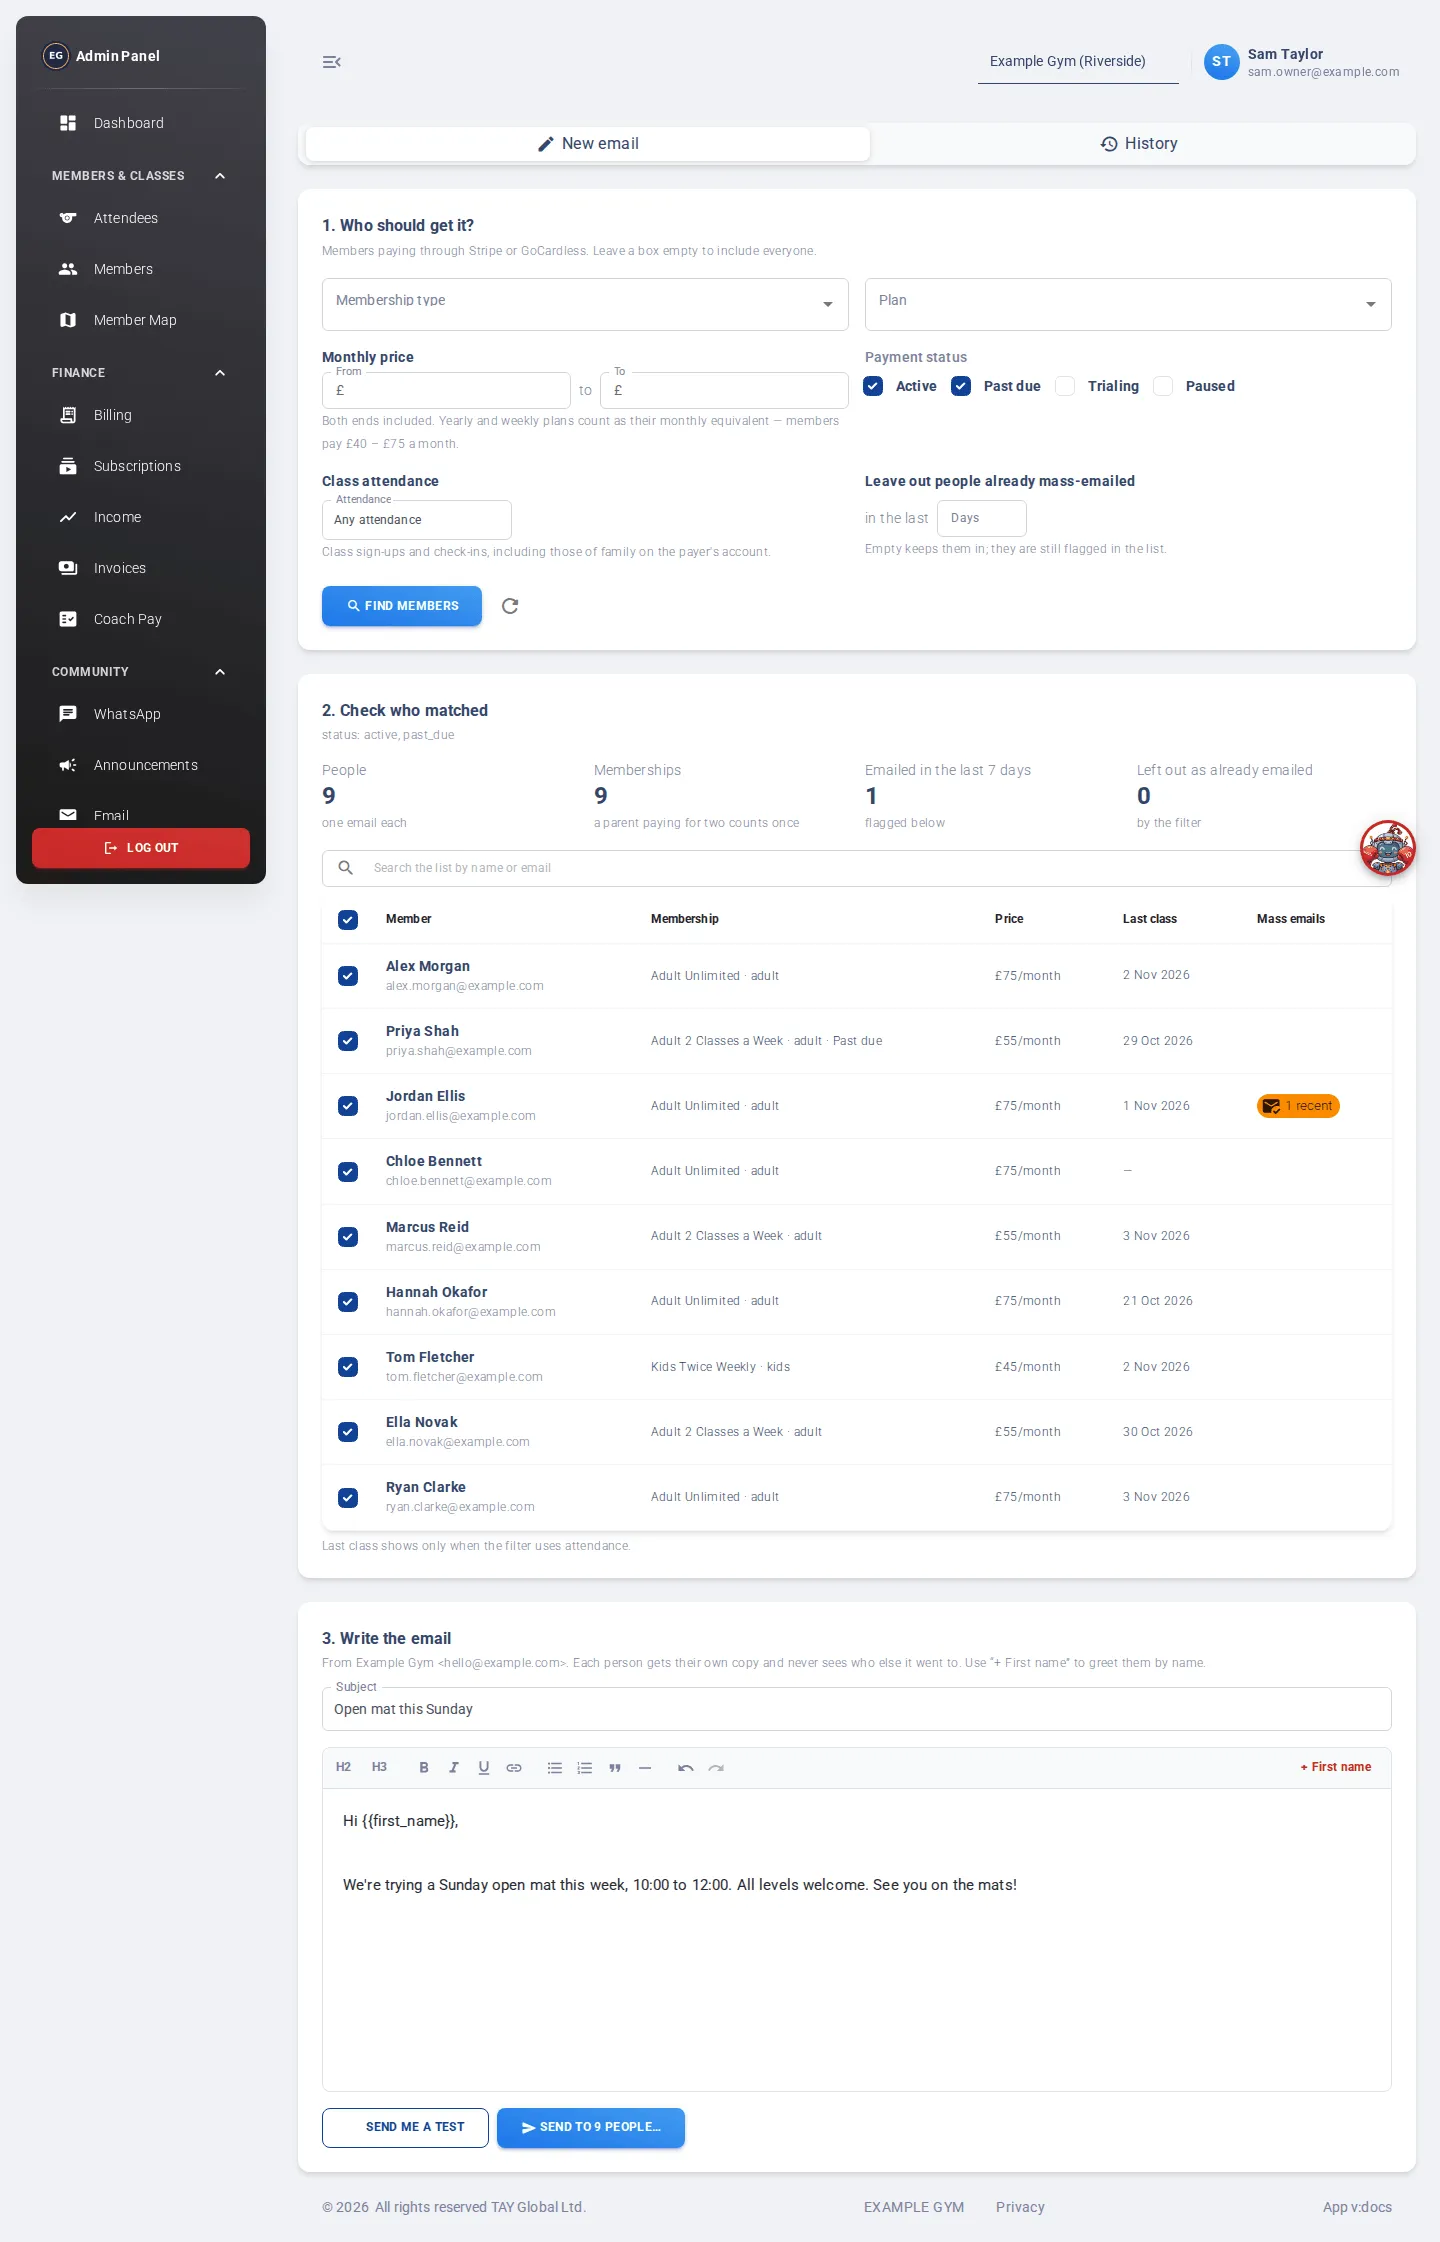
1. Who should get it?
Section titled “1. Who should get it?”The list includes members paying through Stripe or GoCardless. Leave a filter empty to include everyone.
- Membership type and Plan: pick one or more.
- Monthly price: From and To, in £. Yearly and weekly plans count as their monthly equivalent.
- Payment status: Active, Past due, Trialing, Paused. Active and Past due are ticked to start with.
- Class attendance: Any attendance, Came to at least or Came to fewer than a number of classes in the last so many days. Family members on the payer’s account count too.
- Leave out people already mass-emailed in the last so many days.
Click Find members. The list is kept for ten minutes. Click the refresh icon next to the button to fetch fresh payment details.
2. Check who matched
Section titled “2. Check who matched”You’ll see:
- People: how many people will get the email. Each person gets one email, even if they pay for several memberships.
- Memberships: how many memberships they hold between them.
- How many were emailed recently, and how many were left out for that reason.
The table lists each person with their membership, price, last class and recent mass emails. Untick a row to leave someone out. Use Search the list by name or email to find someone.
If you change a filter, click Find members again before sending.
3. Write the email
Section titled “3. Write the email”- Type a Subject (up to 200 characters).
- Write the email. The toolbar has headings, bold, italic, underline, links, lists, quotes and a divider.
- Click + First name where you want each person’s first name to appear, for example after “Hi”.
- Click Send me a test and check the email in your own inbox.
- Click Send to N people….
- Check the subject and the audience. Tick I have checked the list and sent myself a test.
- Click Send to N.
Each person gets their own copy and never sees who else it went to. Replies go to the address shown above the editor.
A progress card shows how many have been sent, failed, or already had it. Click See every recipient for the full list, or Write another email to start again.
If you wait more than two hours between finding members and sending, you’ll be asked to find members again.
History
Section titled “History”- Has someone been emailed? Search by a member’s email or name to see every mass email they’ve received.
- Sent emails lists every mass email: when, who sent it, the subject, who it went to and the result. Click a row to see the email as it was sent and each recipient’s status. If a send didn’t finish, click Resume sending.